A Respectable change

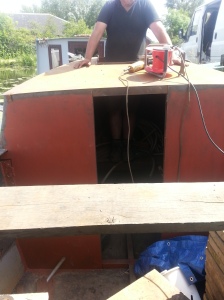
Having a couple of days off work, i decided to head on up and play with the Top planks, and cloths. We also had to make a new deckboard frame, as the dimensions of the first one were for the original hull width and for the longer forecabin.. The bits were fabricated off site and welded together there.

The temporary cloths were bolted through the gunnel upstand so all these had to come off to get to the top planks and start prepping the gunnels. The Temporary planks were removed, they were off the shelf scaff  boards so too narrow and thin. I have had some 12″ x 2″ Douglas Fir fresh sawn on stick for a year seasoning, so it was time to get it out and slice to size.They needed about 5/8″ taking off, and chopping to length. The top edges were rounded over with a 3/4″ rounding over bit to alleviate the cloths rubbing through.

Old Planks

20150530_073852

New Planks being sized and finished.

20150530_141336

Detailing showing curvature of rear plank

20150531_205722

Once the planks were done it was time to deal with the gunnels. There was a bit of surface rust which cleaned up easily with a wire brush. A coat of Dacrylate MIO non slip paint applied and focus was shifted to the clamping strips. These were cleaned up with a flap wheel and again, a coat of MIO to blend in.

Once this was done it was time to attach the side cloths. The Upstand has M8 holes every 100mm, which works out at about 145 per side. Good job we have enough fixings! The Side cloth is placed between and drilled through and bolted. The cloths are reinforced at the factory so are double thickness to take additional stress. The Side cloth strings were made in advance, spliced loop on one end.

Side cloth loosely attached and strung

20150530_164734

We shall ignore deteriorating weather conditions which royally got in the way of the job, needless to say everything got soaked and the temporary cloths blew off overnight.

I took a morning off to help my parents down the Erewash, which took 5 hours, then jumped on a train and back to it! I managed to get the other side cloth on, and then started on the top cloths. These needed eyes welding to the gunnels, which are half chain links, set 2″ back for the ends of the cloths and in line for the centre eyelets. This took a while, and involved much measuring, and as a one man job was quite laborius. However, a few hours broke the back of it, and before long the end was in sight.

Sidecloths in place prior to topcloths being attached.

20150601_191458

Commencing Topcloth fitting

20150602_113459

The job was also made difficult as 1645 is also our store at present, so is full of stuff!

2 Days later and results are there to see, the cloths are on, the tippet is yet to be fitted, that’s for another day. Apart from one side of the cabin, there is a coat of primer on ready for a top coat, and bit by bit, the old cloths are gone, and she is starting to look like a boat again. It’s been a long struggle but we’re nearly there.

Stood on the cabintop looking forward

20150602_151312

Looking from the bank, including new deckboard

20150602_151423

From the opposite bank, showing one cabin side still to prime

20150602_151924

That’s all for now, more updates to follow soon!

Regards,

Dan

What a Difference a year makes!

Evening all!
It’s been a while so here’s an update. Having firmly decided to keep 1645, we pressed jo with bits and bobs. The interior of the back cabin is now primed ready for lining out and the hatches floor is in place.
image

image

This took us into September when BOOM. A massive life change. We follow a canal artist called Pete Tuffrey via various social media channels and he posted he was selling a pair of boats. The boats in question were called Oak and Ash, a rather notorious 10 year old pair of hotel boats, ran by the late Reverend Martin Reed. For us they were perfect. Many cabins, and more square footage than the house. We were coming off our fixed rate mortgage that month, so it fitted perfectly. The day before they were due to be advertised we had already paid out deposit and the craziest 3 months of our life ensued. Packing and moving and moving boats in early Autumn with the boats in Gloucester was difficult to say the least. Needless to say 1645 had now become a store rather than an under cloth fit out. Ultimately she will be my floating workshop, and more updates will follow. The pair are now currently berthed in Billing Marina. It is hoped one day to have all 3 boats united on a nice bit of land somewhere…. If any one hears of any bits or would like to sell us a bit of a field please get in touch!
In the meantime here’s a cheeky peak of the new colour scheme!!
image

Regards
Dan

Cabin works!

Since the last update, much has happened, the top planks have arrived, as have the full set of cloths, and i have to say both look great. The planks are currently sat seasoning in the hold as they are 12″ x 2″ Fresh sawn Douglas Fir, so need to settle.

20140704_143747

The cloths aren’t going on yet, until all the steelworks are complete. Which leads us on nicely to the rear cabin. With the assistance of Pete, at Langley Mill Boatyard, we got the rear cabin on.     

Starting with the cabin top, we roughly placed it into position and scribed the shape required. The top overhangs the side by 20mm, so any run off doesn’t hit the top of the panelling, which is 4″ x 1″ Balau, a durable hardwood usually used for decking. This is a new product for me so we’ll see how it goes. It’ll be cocooned in West System epoxy, and several coats of paint, and well fixed to take into account differential expansion. The final edge of the cabin top will be finished once the panelling is on.

20140704_115552


Once the top had been plasma cut, we then offered up the sides for scribing. The sheets were 4000 x 1000mm and I made the cabin 3970 to allow for a 30mm tolerance on the sheet. This allowed us to balance the sheet on and scribe the bottom and then also the top.

20140704_143741

Once that was done, it was a matter of placing the cabin top of, and welding all seams.20140705_175023

Now, the cabin is quite tall for a traditional “butty”, however the hull is very shallow, at only 37″, i needed to adjust the height of the cabin to any chance of headroom, at that, there is only 6′ from base plate to bottom of roof beam.

The next job is grab rails. These are in a “Yarwoods” style, i’e flat bar on upstands. This allows water to run off, rather than “Woolwich” style which always traps any water. I used some 40 x 8mm Convex bar, and 1″ round tube for upstands. It actually pulled round quite nicely, because of the overhang of the cabin top i was able to get a ratchet strap to pull it in and down at the same time, without the bar twisting or deflecting.

20140815_172244

I also added a 25mm x 6mm upstand around the slide cut out, to which the runners will ultimately attach. the cabin top was then treated to a clean and coat of Super Ruscon.

The next job was adding the hatches, as the original is too low. The frame is 70mm angle attached to the hull and the floor is 4mm plate. The side pieces were scribed, and then a centre panel cut to fit.

After that, we sliced down some more 4mm sheet to make some rear doors, and in no time at all, 1645 is beginning to look like a boat!

20140816_181349

The other job we did was add a tiller socket on to the Ellum, which was the final job before it was finished, the socket was made off site and made to the Tiller. Careful measurements were taken so the Tiller when “in” just clears the doors and slide. Then the main Ellum stock had a hole chopped in the front, transposed on the correct angle to the rear, another hole chopped, and the socket put in, then marked, taken out, sliced to the right shape, and reinstalled. Once it was exactly right it was welded into position, and the Ellum is complete!

20140815_17215420140815_172214

That’s all for now, more updates to come once we do some more!!


Regards


Dan


An Update!

So, as mentioned a few months ago, we sadly put 1645 on the market and get the word out that she was for sale. Since then, and after little interest, we have recommenced work on her, after finding a way of funding her (work promotion!).

So, March she went on dock with the wooden tug ‘Judith Anne’ which was being re-caulked. This gave us a chance to give her a good blacking and reinstate the ends of the guard irons at the front end. These had been removed years ago, and replaced with some rather crude imitation guard sections, so i fabricated some ends. They are basically 8mm plate and some tapered tube. So many times the blunt ended guards caught on things, so i’ve given them a bit of shape, to ensure no catching activities follow!

20140320_132528-1

We also gave her a quick lick of Gloss around the front and back end as psychologically it makes a big difference:

20140418_172312[1]

Moving forward to a few weeks ago, and having re designed the layout, I decided to remodel the forecabin, as the girls will now be sleeping in the back cabin extension. We lost about 8″ off the height and 2′ off the length, so it follows the kick of the hull, no nice delicate sweep on this fore-end!

20140611_17190220140612_15432020140612_150430

Overall it is a better looking cabin than before, but slightly less practical for a fitout, nothing we can’t deal with though!

We’ve also started putting some floors in the hold. These are reclaimed plywood sheets as a temporary floor, but actually, we quite like them so are going to keep them!

20140518_140732[1]

The top planks have also been ordered from Hingley’s Timber Yard in Derbyshire, and i’m currently placing an order for a new set of cloths. The guys at Langley Mill boatyard are welding the rear cabin on for me, as, realistically, i haven’t enough time to do it myself.

So, hopefully, in a few weeks she is going to look like a boat again!


Regards for now,


Dan


And so life changes

It’s been a while. Happy New Year!

Much has happened since i last wrote. The biggest change is in our personal circumstances at home. After much deliberation Vikki has decided to give up work to become a full time mum to our girls. Now obviously this changes many things, including BCN1645. Simply put, with only one income we can’t afford to keep a boat as well, so sadly she has been put on the market. Whilst she may not be the prettiest at the moment, she has a sound hull and all steel there to complete the cabins as required, as well as all the floor bearers. We are a little gutted to say the least, many hours have gone into her, by many people, but needs must.

So, if anyone is in the market for a butty, or a boat to look at making a liveaboard out of, I believe she is priced fairly given the work completed and condition. Spread the word people, there is a deal to be done!

http://narrowboats.apolloduck.co.uk/advert.phtml?id=343066

Thank you all for your follows and kind words, i hope she brings as much joy to others as she has us over the past couple of years.

Regards for now,


Dan

Bulkheads, welding and steel steel steel!!

It’s been a couple of weeks since i popped up to do any work, however, i had a few days annual leave booked at work, so had a mammoth few days, as i had ordered the steel for the cabins and a few other bits and bobs. I also had the cabin frames to fit, which is what i started with.

The Forecabin.

I know that to many “purists” the forecabin looks high. It is high. I thought about this for a while, and as the hull has a very pronounced kick, rather than a gentle sweep, (the kick measured at 1:6!) i took an early decision to have the cabin follow the hull. The back cabin isn’t so much of a problem, as it doesn’t go all the way to the rear deck, so the kick isn’t as severe.

I then had to think about what i will use it for, which is a cabin for my two daughters,  so i decided it was better to have some extra space than have a low cabin with no space.

Job one was tacking the frames together, and positioning:

20130920_113830

20130920_174242

Once these were all positioned, and measured, it was time to remove the front beam, and boy did this take some effort, 83 years of corrosion would not let go, but eventually it gave, and the forecabin space suddenly revealed it self in all it’s spacious glory!

I then spent a bit of time adding framing between the roof beams, and creating a frame for the hole for the slide to add rigidity to the structure.

Day two was spent starting to put up the rear cabin frames, and welding the Plates under the gunnels for the A Frames, these are pieces of 110 x 10 flat bar, which are cut to 225mm allowing 100mm under the gunnels, and then once attached smacked level with a sledge hammer to be level, as thee gunnels are slightly tipped to allow water run off (that was always the plan………!). This also ensured the welds would hold, which they did!

We then attached the A frames, which fitted really well, well, within a couple of mm!

Dock was floated on Sunday morning, and the butty was tied up along side drydock for works to continue.  on the way up, the ellum caught on the drain paddle, and snapped the weld on the top pintle socket. No bad thing as it needs to come off for work anyway, it just saved me a grinding disc.

Once alongside dock, we started to fit the bulkheads onto the frames. The sheet had been chopped to size on order, so the sheets were lifted in, sliced to fit over the gunnel, then scribed to match the hull sides, which are significantly straighter than before. This takes a bit of time, but luckily fitted first time!!  This takes the majority of the day, to do the front bulkhead of the rear cabin, but it means the cabin is starting to take shape.

The next day was spent putting the two rear cabin rear bulkheads on. I purposefully haven’t ran these down to the bottom of the hull, as i want the ability to run the side berth under the hatches for a bit extra length. I was on my own for this, but as the sheets were smaller it wasn’t too bad, well, nothing a few extra clamps couldn’t sort out.

Whilst i was doing this, my dad was in the hold drilling the upstand for the cloths. This is a piece of 25×6 flat bar with holes every 100mm. by the time it had been pilot drilled then drilled out it was nearly 600 holes, not bad for 4 hours work, and meant i could crack on with other things. I managed to seam weld the rear bulkheads on, and then by the end of the day, one of the upstands was tack welded into position, and also a coat of rust preventer and red oxide was applied to the gunnel and A frames. It’s amazing the difference a coat of paint makes! :

20130923_183254

20130923_183247

By now it was Tuesday, and that was spent with Tom welding the upstands on, my dad drilling out the 25 x 3 clamping bar for the cloths and I started looking at putting up the temporary top planks in anticipation of winterising her and weatherproofing her. The A frames work really well, and with a bit of chopping around the mast and chimney holes, the front 3 bays had planks again!

The other thing i looked at was a rough cutting of the cabin tops, as I wanted to get them on to let them get a set on ready for the spring when attached. The rear one wasn’t too bad but the front one needs a bit of manipulation in both the x and y axis, due to the sweep and curve. It also meant that i could clear the yard of all my steel which was ultimately getting in their way!

Wednesday came which was the last day i was around so we looked at clothing her over. My dad had a green tarpaulin spare which would do half the hold, so on it went! The clamping bar works really well, the reclaimed bolts were just long enough, and give a really neat solution, which is good, because it was tipping it down! Once clothed, we got a great idea of the final space inside the hold, which is quite spacious!!

20130925_145855

Pete also very kindly craned the rear cabin top on for me, as we would never have lifted it, which gave us a great idea of the final cabin shape20130925_151936 20130925_145918

Again, this will be fitted in the spring.

We also looked at manipulating the front cabin top, which went quite well, involving a 5 ton ratchet strap and a bar under the gunnel.

It pulled round quite nicely, and once tack welded into position held it’s shape. I just need to add another cabin beam in as it dips down a bit before the sweep, but otherwise is fine:

20130925_133755

So that’s where we left it, with a bit of tidying, i’ll be back up with another bit of cloth for the rear hold in due course, but overall i’m very happy with the progress made in 6 days!!!!

Regards

Dan

Roof beams, a back cabin stove and a bit of identity!

As the works have been completed by the yard, to a very good standard, it’s now down to me to keep things moving!

I went up last weekend, to do a spot of welding and pay the bill, i started by welding!. The gunnels were only tack welded on, as we were leveling them, and getting them correct. Now was the time to seam them on, which was easier as she was still on dock. This took a few hours, up to the point of the weather deteriorating, so i have got the yard to do the other side. I’ve added a couple of bits in on the ends of the new gunnels to blend them in a bit where we chopped the old BW sections out, but i don’t think they will ever truly blend in.

I was contacted by a friend asking if anyone I knew wanted a boat range…

Now, i’m not one to give up an offer like that so was put in touch with the owner, and eventually was able to pick it up from Crick on the way back home. So the back cabin will be furnished with a “Class1c” stove, which has hardly been used. 1 happy Dan!!

The other thing i have ordered which arrived today is the replacement gauging plates. These look absolutely fantastic, and will give the boat her identity again. One will go in the “hatches” in roughly the same position as the original, the other one, which historically would have been in the bow will go on the front bulkhead of the forecabin, as otherwise it would be behind the girls’ beds!!!

20130821_154031

What of the roof beam i hear you ask??

Well, in the end it was cheaper and quicker to have them laser cut out of 4mm plate, given the quantity, the strength won’t be a problem and they give me the exact profile I need.

All in all things are moving, i hope to go up and fit some cabin frames and the A Frames in the next couple of weeks, stand by for more updated!!

Regards

Dan


A waterproof bottom and an ‘ell of an ‘ellum!

It’s been a few weeks since i last wrote anything. Mainly because there’s not much to write about since A Frames were made.

However, now,  things have moved on a bit! the footings and bottom are now watertight! This is good, because they day before I planned to go up and black the hull, they took her off dock!

At least we know she doesn’t leak!

#20130803_101033

I had hoped to get some cabin beams on her to hold her into beam, and also the A Frames fitted but ho hum. They have assured me she’s going back on on Monday to be finished off, blacked, and the Kelson fitted. In the meantime the braces are staying on!

So the plans changed somewhat. On dock we realised that the second gunnel we had reinstated had a bit of a wobble on it, so we spent a couple of hours tweaking the position of it, luckily when the tack welds were cut, it naturally fell to where it needed to be.

The next job we decided to do was fit the rudder. Pete offered the use of the crane at the yard, but i was trying to not use it,  as being a man I was convinced we could do it on our ownI So we found the small set of wheels on the boat and wheeled it round from the side of dock. We had measured the lower pintle a couple of times, and it is within 5/8″ of the base plate, but as she is only drawing 6″, not too much of a problem. More on this later!

We had plenty of lifting equipment, and ratchet straps to assist, and it was decided to stand it up, and half get it over the bank, square it up to the hull, and slide it down and on, bit of a one chance saloon, in case we missed!! we decided to reduce the risk and push the fore end over to the other bank, to get the stern post closer to the bank. This helped alot!

We had a couple of ropes on it, and before we knew it, it had teetered over the edge, a slight moment of fear, and then the lower pintle was located! Luckily it slipped in 1st time and we didn’t miss!

We secured the top with a ratchet strap to allow us to pull it into position, as we had to take an average due to the battered stern post.

20130803_113454

The next job was to position the top pintle. This needed a bit of careful measuring. The locking nut on the back is an M30 one which needed to clear the corner, so we took the absolute bare minimum clearance and then altered the angle until the pintle was parallel to the lower one. This puts the pintle a couple of inches higher than we would have liked,  but as I didn’t have a forge or blowtorch to hand to alter the angle, It didn’t offend me enough to warrant stalling the job!

The next thing we looked at was the top pintle socket. Tom thought the recess wasn’t deep enough so he pootled off to find a bit of 1 3/4″ bar to make a new one, also the hole was a bit too big, by about 1/4″ so a smaller one was drilled.

While he was away I cleaned up the first gunnel of the remains of the upstand, which didn’t take too long to remove, although a bit of it flew off and caught my skin, which hurt a bit!

Tom came back with a new Pintle socket, and it worked a treat, although we thought the hole was in hindsight a bit small. We cleaned the pintle up a bit to get a better fit, but even so, when it was tacked into position, there wasn’t enough play on it and the welds snapped. So Tom took it back to widen the hole, which then worked a treat. Once back we welded it into position, and then checked the extremes of rudder swing, and once there, tacked it into position.

20130803_154414

Once the pintle socket was secured, we looked at attaching the pintle to the rudder stock, to ensure it was hanging straight and true.  This took a bit of time and manipulation, but eventually we succeeded!

Going back to the bottom of the blade when its swung round, it doesn’t quite come far enough as the lower float catches the base plate, so once back on dock, i may look at tweaking the front edge to allow it to swing a bit further. The other bit I need to rectify is a wedge spacer to square off the M30 nut on the back edge.All of these are little niggles, but overall i’m very happy with it, and once these couple of niggles are rectified, it should look grand!!

20130803_16424320130803_162753


Regards for now,

Dan


Liposuction and A Frames!

It’s all been a bit quiet recently, as there’s not really much to report, as it’s all about the footings and preparation of the hull ready to receive them! Also work has been commenced on pulling the hull in a couple of inches to 6’9″ giving an extreme width of 6’11” which looking at some of the stories of stuck boats and collapsing lock walls isn’t a bad idea!

Remains of original beam sliced and ratcheted in to new beam.

001 (5)

Moving forwards and work has begun on putting in the new footings. I have to say that the new steel is transforming her already, and Pete is happy in the way the hull sides are straightening out.

005 (3)

The knees which were removed have now been straightened and are awaiting re attaching once the footings are in place, and as yeat, we haven’t needed to use any of the 3″ angle, although we’ll see what happens with that once the footings progress!!

The other thing i have started working on is the A frames to go in place of any stands and cross beams, as we are using the hold as living accommodation. They are made out of 100  x 50 x 3mm mild steel box. I was convinced the ones for ‘Meteor’ were bigger, but as ever, i was wrong and my dad was right! Several drawings were done for these for different designs, given different potential layouts, however now the layout has been finalised, I can start welding them up.

One has been made to accept a towing mast, one to accept a 5″ flue for the solid fuel stove and one standard one. They still need cleaning up and their feet fabricating but they are getting there. I made a jig to line up the steelwork, so as to ensure they were all in the same position, mainly for the top angle of 125 degrees and 55 degrees at the bottom.

A Frame no. 1 Tacked into position:


20130711_123747


Front A Frame (Towing Mast) being tacked into position. The mast tube is made of 120 x 120 x 6 Box Section.

20130711_143335

1st stage of fabrication complete, minus feet.

20130711_190246(0)


More updates to follow!

Regards,

Dan

Braunston, boats, beer and a bottom for sale…only 4 careful owners!

This weekend i decided to spend the weekend at Braunston doing meaningful and purposeful research on Day boats. Unfortunately on Friday evening i didn’t see any so drowned my sorrows in the beer tent. There was a great atmosphere and a great group of people, many I hadn’t seen for a while so it was good to catch up. Liam and Kerry, of Longford Canal Services very kindly donated Ariel’s back cabin to me for the evening so I had somewhere to stay, and the hospitality on ‘Linnet’ by Kerry’s parents was fantastic!

Saturday was spent wandering around in the morning and on the parade in the afternoon, which was quicker than previous years. Unfortunately i had to work that evening so left about 7.45 to dash back home. I didn’t manage to take any photos, as i kept forgetting, other than a blurry late night Bolinder firing on ‘Greyhound’, oh the stories…….!

I returned on Saturday with Vikki, Lily-Mae and Daisy, for a family day out, and introduce Daisy to the world of boats. We didn’t arrive till half eleven so the parades were in full swing, so we sat by the stop house and had a picnic, before heading off to ‘Linnet’, for people to meet Daisy!

We left about half 1, and had a slow wander back round past the arm to catch up with Dawn, Sarah and Tom, on ‘Lamprey’ and ‘Verbena’ amongst others. Having decided nothing else could tempt us on the stalls, we headed back to MK to sit in the garden and have a coffee!

Monday morning I dropped Lily-Mae at the Childminders and inevitably headed onto the M1 for the trip up to Langley Mill for the day. The plan was to do some measuring of BCN1645 and help my dad on ‘Judith Anne’. I arrived at the boat yard about 9.45 to find my way blocked by the crane, and this at the side of the road:

20130701_144002

I used this time to have a quick catch up with how things are going, and they are certainly cracking on with it. The bottom and original footings are all off, and craned out of dock, and already she is starting to look better!

20130701_145313

Pete, my dad and me had a long discussion about hull width as she’s quite a wide old girl, and we’ve decided to pull her in to an extreme width of 6ft 11, so as to eliminate the majority of pinch points. What surprised me was as the wind picked up, the sides were blowing around like a bit of paper in the breeze, which shows just how fragile the hull is at present!

The other thing that surprised me was just how much the bottom had deflected when filled with concrete. The newer Channel knees which BW had added in had only been tack welded across the bottom, so the welds cracked under load:

20130701_145322

There was probably a pool about 5 – 6 inches thick of concrete around this point, no wonder the bottom was so distorted!!

So from now, the hull gets neatened up and prepped, and dropped down onto the new base plate. The knees, or rather, whats left of them have been removed and are going to be straightened and put back, and where required new ones will be added.

Hopefully next time we’ll see her dropped down and being put back together, but so far so good….

Oh, and the bottom isn’t for sale, it’s being weighed in and probably recycled!!

Regards

Dan